


Are you looking for a small, quick, and meaningful crochet project?
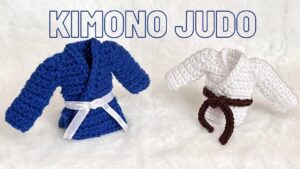
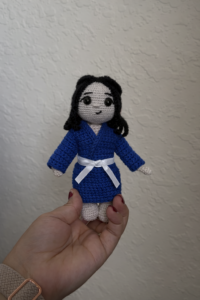
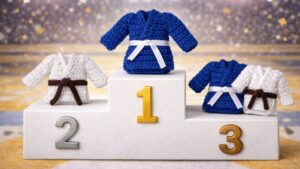
This crochet judo kimono is perfect for you. Not only is it easy to make, but it’s also ideal as a personalized keychain
or a thoughtful handmade gift for someone who loves this martial art.
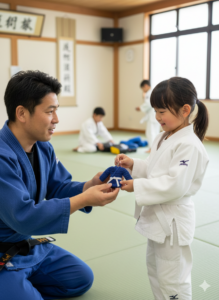
Whether you practice judo yourself, have a teacher you appreciate, or know someone special who loves this sport, I’m sure this will be a very meaningful gift.
A personal touch…
I made this kimono at the request of a follower from my YouTube channel.
It’s a project I never planned to create, but one that I truly enjoyed from start to finish.
María, the person who asked for this step-by-step tutorial, wants to make it as a gift for her granddaughter’s judo teacher, and I’m so happy to be part of this beautiful gesture in some small way.
This is one of those projects that is not only cute to look at, but also part of a special story. I can already imagine this little girl giving her teacher a crochet judo keychain made by her grandmother, following my tutorial.
Thinking about that makes me incredibly happy, both as a crochet designer and on a personal level. Being able to help someone create a meaningful handmade gift truly fills my heart.
What will you learn with this project?
In this tutorial, I guide you step by step, using basic stitches such as single crochet.
It’s perfect if you’re just starting out in crochet or if you want to practice small pieces with details.
You’ll also get to experiment with shaping sleeves and seams, something not all beginner projects include.
It’s a simple project, but full of little details that I’m sure you’ll enjoy learning while you make it.
Ideas for use:
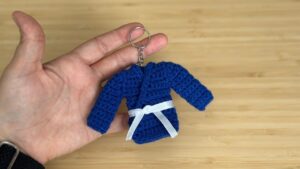
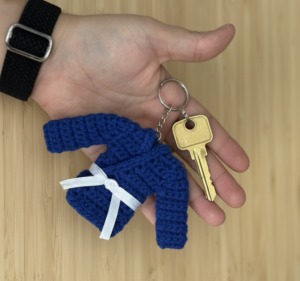
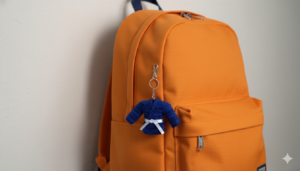
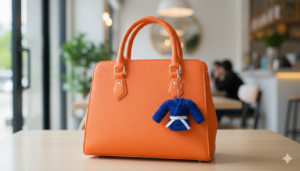
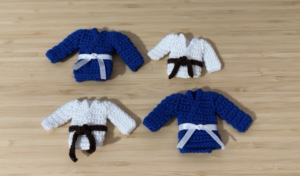
- Keychain: Add a metal keyring and you’ll have a useful and original gift. This is the option I recommend in the video.

Doll accessory: If you adapt it to your doll’s measurements, it will be the perfect addition to her wardrobe, adding a sporty and adorable touch—ready for her next match.
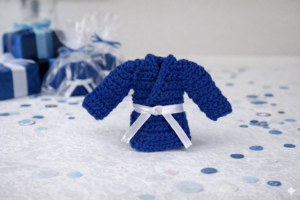
Decoration: You can place it on a desk, backpack, or a special corner of your home. You can even add a small motivational note or reminder to make it extra special.
Meaningful gift: Perfect for athletes, judo students, martial arts lovers, or teachers.
Suggested materials
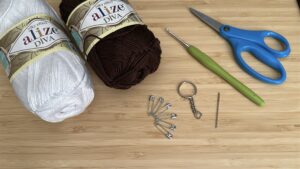
🧶 Alize Diva silky effect 100% Acrilic ( Yarn of your choice)
🪝 Crochet Hook 2.0 mm
📏 Measuring Tape
🪡 Tapestry Needle
🧷 Stitch Marker
✂️ Scissors
🎀 6 mm Satin Ribbon
👉 Keychain Kit (Optional)
You can use acrylic yarn, cotton, or similar materials.
Just keep in mind that the yarn weight and hook size will affect the final size of your piece.
In my Amazon Storefront you’ll find more options you can choose from.
Where to watch the tutorial?
Below, you’ll find the complete written step-by-step instructions for this project.
However, I recommend watching the video tutorial as well, since some important steps are easier to understand visually.
Share your creation
If you decide to make this project, I would love to see your result!
You can share your photos on social media and tag me on Instagram, Facebook, or TikTok, or leave me a comment telling me about your experience.
📲 Find all my social links here
Who would you love to make this for?
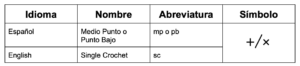
Stitches and Abreviations:
Slip Knot (sk)
Chain Stitch (ch)
Single Crochet in V (sc)
Slip Stitch (sl st)
Increase (inc)
Back Loop Only (BLO)
Back:
1- sk, 11 ch, BLO 10 sc (10)
2–8- 1 ch, turn, 10 sc (10)
9- 1 ch, turn, BLO 10 sc (10)
10–14- 1 ch, turn, 10 sc (10)
15–16- 1 ch, turn, 3 sc (3)
17- 1 ch, turn, 2 sc, 1 inc (4)
18- 1 ch, turn, 4 sc (4)
19- 1 ch, turn, 3 sc, 1 inc (5)
20- 1 ch, turn, 5 sc (5)
21- 1 ch, turn, 4 sc, 1 inc (6)
22- 1 ch, turn, 6 sc (6)
23- 1 ch, turn, BLO 5 sc, 1 inc (7)
24- 1 ch, turn, 7 sc (7)
25- 1 ch, turn, 6 sc, 1 inc (8)
26- 1 ch, turn, 8 sc (8)
27- 1 ch, turn, 7 sc, 1 inc (9)
28- 1 ch, turn, 9 sc (9)
29- 1 ch, turn, 8 sc, 1 inc (10)
30- 1 ch, turn, 10 sc (10)
Repeat another Shoulder and the other Front:
15- sk, insert into the 3rd stitch, 3 sc (3)
16- 1 ch, turn, 3 sc (3)
17- 1 ch, turn, 1 inc, 2 sc (4)
18- 1 ch, turn, 4 sc (4)
19- 1 ch, turn, 1 inc, 3 sc (5)
20- 1 ch, turn, 5 sc (5)
21- 1 ch, turn, 1 inc, 4 sc (6)
22- 1 ch, turn, 6 sc (6)
23- 1 ch, turn, BLO 1 inc, 5 sc (7)
24- 1 ch, turn, 7 sc (7)
25- 1 ch, turn, 1 inc, 6 sc (8)
26- 1 ch, turn, 8 sc (8)
27- 1 ch, turn, 1 inc, 7 sc (9)
28- 1 ch, turn, 9 sc (9)
29- 1 ch, turn, 1 inc, 8 sc (10)
30- 1 ch, turn, 10 sc (10)
1- sk, insert into row 17, 1 ch to secure, and in the same stitch 1 sc,
1 sc in row 16, 1 sc in row 15, 1 sc in row 14 (4)
2- 1 ch, turn, 4 sc, 1 sc in row 18 (5)
3- 1 ch, turn, 5 sc, 1 sc in row 13 (6)
4- 1 ch, turn, 6 sc, 1 sc in row 19 (7)
5- 1 ch, turn, 7 sc, 1 sc in row 12 (8)
6- 1 ch, turn, 8 sc, 1 sc in row 20 (9)
7- 1 ch, turn, 9 sc, 1 sc in row 11 (10)
8–15- 1 ch, turn, 10 sc (10)
Cut the yarn leaving it long enough to sew the sleeve to the armhole, and to join the front and back, leaving one part open to simulate the kimono.
1- sk, insert into row 14, 1 ch to secure, and in the same stitch 1 sc,
1 sc in row 15, 1 sc in row 16, 1 sc in row 17 (4)
2- 1 ch, turn, 4 sc, 1 sc in row 13 (5)
3- 1 ch, turn, 5 sc, 1 sc in row 18 (6)
4- 1 ch, turn, 6 sc, 1 sc in row 12 (7)
5- 1 ch, turn, 7 sc, 1 sc in row 19 (8)
6- 1 ch, turn, 8 sc, 1 sc in row 11 (9)
7- 1 ch, turn, 9 sc, 1 sc in row 20 (10)
8–15- 1 ch, turn, 10 sc (10)
Cut the yarn leaving it long enough to sew the sleeve to the armhole, and to join the front and back, leaving one part open to simulate the kimono.
1- sk, insert into the first stitch of the front piece that goes underneath,
make 1 sc for each row (approximately 13 sc),
3 inc, 6 sc, 3 inc, 12 sc,
1 triple inc at the corner,
9 sc, 1 ch, 5 sl st in the opening, move to the next one and make 5 sl st in the other side of the opening,
1 ch, 10 sc, 1 ch, 5 sl st in the opening, move to the next one and make 5 sl st in the other side of the opening, 1 ch, 9 sc, 1 sc next to the first single crochet of the round, cut the yarn leaving it long enough to secure and hide it between the stitches.
Using a tapestry needle, make an invisible join by passing the needle under the strands of the first stitch.
Hide the yarn between the stitches.
Belt:
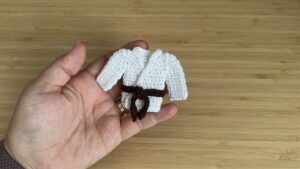
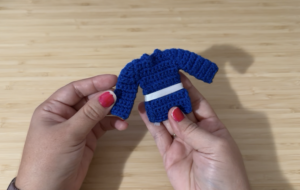
Ribbon approximately 35 cm long. Tie it as shown in the image, or the way you usually tie your belt when practicing judo. Cut the excess ribbon and carefully melt the ends.
Crochet Belt Simulation:
sk, 51 ch, BLO 50 sc, hide the yarn between the stitches, sew the belt onto the kimono and make a knot.
If you want it longer, make the chain strip with 60 stitches.
Add keychain.
And now your JUDO KIMONO is ready.
¿Buscas un proyecto pequeño, rápido y significativo para practicar crochet?
Este kimono de judo en crochet es perfecto para ti. No solo es fácil de hacer, sino que también es ideal como llavero personalizado o como un bonito detalle para regalar a algún amante de este deporte y de las artes marciales.
Ya sea que practiques judo, tengas algún profesor cercano o conozcas a alguien especial que ame este deporte, estoy segura de que será un regalo muy especial.
Un toque personal…
Este kimono lo tejí a petición de una seguidora de mi canal de YouTube.
Es un proyecto que no tenía en mente realizar, pero que terminé disfrutando muchísimo durante todo el proceso.
María, la persona que me pidió este paso a paso, quiere hacérselo al profesor de judo de su nieta, y yo feliz de poder ser partícipe, de alguna manera, de este bonito detalle.
Este es uno de esos proyectos que no solo son bonitos a la vista, sino que también forman parte de una historia especial. Ya me imagino a esta pequeña niña regalándole a su maestro un llavero de judo hecho por su abuela, siguiendo mi tutorial.
Pensar en eso me hace muy feliz, tanto como diseñadora de crochet como a nivel personal. Poder ayudar a alguien a crear un regalo con significado es algo que valoro muchísimo.
¿Qué aprenderás con este proyecto?
En este tutorial te guío paso a paso, utilizando puntos básicos como el medio punto o punto bajo.
Es ideal si estás comenzando en el mundo del crochet o si quieres practicar piezas pequeñas con detalles.
Además, este proyecto te permitirá experimentar con formas en las mangas, algo que no todos los proyectos para principiantes incluyen.
Es un proyecto sencillo, pero lleno de pequeños detalles que estoy segura disfrutarás y aprenderás mientras lo elaboras.
Ideas de uso:
- Llavero: Agrégale una argolla metálica y tendrás un regalo útil y original.
Accesorio para muñecas: Si lo adaptas a las medidas de tu muñeca, será el complemento perfecto para su armario, dándole un toque deportivo y adorable, lista para el combate con su oponente.
Decoración: Puedes colocarlo en un escritorio, una mochila o en un rinconcito especial del hogar. Incluso puedes añadirle una notita motivacional o un pequeño recordatorio.
Regalo especial: Perfecto para deportistas, estudiantes de judo, amantes de este arte marcial o profesores.
Materiales sugeridos
🧶 Alize Diva silky effect 100% Acrilic ( Usa el hilo de tu preferencia )
🪝 Gancho 2.0 mm
📏 Cinta Métrica
🪡 Aguja Lanera
🧷 Marcador de Puntos
✂️ Tijeras
🎀 Cinta de satín de 6 mm
👉 LLavero Kit (Opcional)
Puedes usar hilo acrílico, algodón o materiales similares.
Ten en cuenta que el grosor del hilo y el tamaño del gancho influirán en el tamaño final de la pieza.
En Storefront de Amazon encontrarás otras opciones que pueden servirte.
¿Dónde ver el paso a paso?
En la pestaña siguiente te comparto el paso a paso escrito completo de cómo realicé este kimono.
Aun así, te recomiendo complementar con el video tutorial, ya que hay algunos pasos importantes que se entienden mejor de forma visual.
Comparte tu creación
Si decides hacer este proyecto, ¡me encantaría ver tu resultado!
Puedes compartir tus fotos en mis redes sociales o etiquetarme en Instagram, Facebook o TikTok para verlo y dejarte un comentario .
También puedes dejarme un comentario contándome cómo fue tu experiencia.
📲 Encuentra todas mis redes sociales aquí
¿Para quién lo harías tú?
Puntos y Abreviaturas:
Nudo Corredizo (nc)
Punto Cadena (cad) (ch)
Medio Punto en V (mp) (sc)
Punto Deslizado (pd) (sl)
Aumentos (aum) (inc)
BLO Sobre la hebra trasera (Back Loop Only)
1- nc, 11 cad, BLO 10 mp (10)
2-8- 1 cad giro, 10 mp (10)
9- 1 cad giro, BLO 10 mp (10)
10-14- 1 cad giro, 10 mp (10)
15-16- 1cad giro, 3 mp (3)
17- 1 cad giro, 2 mp, 1 aum (4)
18- 1 cad giro, 4 mp (4)
19- 1 cad giro, 3 mp, 1 aum (5)
20- 1 cad giro, 5 mp (5)
21- 1 cad giro, 4 mp, 1 aum (6)
22- 1 cad giro, 6 mp (6)
23- 1 cad giro, BLO 5 mp, 1 aum (7)
24- 1 cad giro, 7 mp (7)
25- 1 cad giro, 6 mp, 1 aum (8)
26- 1 cad giro, 8 mp (8)
27- 1 cad giro, 7 mp, 1 aum (9)
28- 1 cad giro, 9 mp (9)
29- 1 cad giro, 8 mp, 1 aum (10)
30- 1 cad giro, 10 mp (10)
15- nc, pasarlo por el 3 punto, 3 mp (3)
16- 1 cad giro, 3 mp (3)
17- 1 cad giro, 1 aum, 2 mp (4)
18- 1 cad giro, 4 mp (4)
19- 1 cad giro, 1 aum, 3 mp (5)
20- 1 cad giro, 5 mp (5)
21- 1 cad giro, 1 aum, 4 mp (6)
22- 1 cad giro, 6 mp (6)
23- 1 cad giro, BLO 1 aum, 5 mp (7)
24- 1 cad giro, 7 mp (7)
25- 1 cad giro, 1 aum, 6 mp (8)
26- 1 cad giro, 8 mp (8)
27- 1 cad giro, 1 aum, 7 mp (9)
28- 1 cad giro, 9 mp (9)
29- 1 cad giro, 1 aum, 8 mp (10)
30- 1 cad giro, 10 mp (10)
1- nc, insertarlo en la fila 17, 1 cad para asegurarlo y en ese mismo punto 1 mp, 1 mp en la fila 16, 1 mp en la fila 15, 1 mp en la fila 14 (4)
2- 1 cad giro, 4 mp, 1 mp en la fila 18 (5)
3- 1 cad giro, 5 mp, 1 mp en la fila 13 (6)
4- 1 cad giro, 6 mp, 1 mp en la fila 19 (7)
5- 1 cad giro, 7 mp, 1 mp en la fila 12 (8)
6- 1 cad giro, 8 mp, 1 mp en la fila 20 (9)
7- 1 cad giro, 9 mp, 1 mp en la fila 11 (10)
8-15- 1 cad giro, 10 mp (10)
Cortar la Hebra dejándola lo suficientemente larga para unir la manga hasta la sisa, y el frente y la espalda, dejando una parte abierta simulando el kimono.
1- nc, insertarlo en la fila 14, 1 cad para asegurarlo y en ese mismo punto 1 mp, 1 mp en la fila 15, 1 mp en la fila 16, 1 mp en la fila 17 (4)
2- 1 cad giro, 4 mp, 1 mp en la fila 13 (5)
3- 1 cad giro, 5 mp, 1 mp en la fila 18 (6)
4- 1 cad giro, 6 mp, 1 mp en la fila 12 (7)
5- 1 cad giro, 7 mp, 1 mp en la fila 19 (8)
6- 1 cad giro, 8 mp, 1 mp en la fila 11 (9)
7- 1 cad giro, 9 mp, 1 mp en la fila 20 (10)
8-15- 1 cad giro, 10 mp (10)
Cortar la Hebra dejándola lo suficientemente larga para unir la manga hasta la sisa, y el frente y la espalda, dejando una parte abierta simulando el kimono.
1- nc, pasar el nc por el primer punto del frente que va por debajo como si hiciera un pd, hacer 1 mp por cada una de las filas, 13 mp aproximadamente, 3 aum, 6 mp, 3 aum, 12 mp, 1 aum triple en la esquina, 9 mp, 1 cad, 5 pd en la abertura, me paso a la siguiente y 5 pd en la otra parte de la abertura, 1 cad, 10 mp, 1 cad, 5 pd en la abertura, me paso a la siguiente y 5 pd en la otra parte de la abertura, 1 cad, 9 mp, 1 mp junto al primer medio punto de la vuelta, corto la hebra dejándola lo suficientemente larga para asegurarla y esconderla entre lo puntos, con aguja lanera hago un cierre invisible pasando la aguja por debajo de las hebras del primer punto. Escondo la hebra entre los puntos.
Cinta de aproximadamente 35 cm. Hacer el amarre como se indica en la imagen, o como sueles amarrar el cinturón cuando practicas judo. Cortar el exceso de cinta, y quemar las puntas con cuidado.
Simulando el cinturón en Crochet: nc, 51 cad, BLO 50 mp, esconder la hebra entre los puntos, coser el cinturón al kimono y hacer un nudo. Si lo quieres mas largo haz la tira de cadenas con 60 puntos.
Agregar Llavero.
Y así tienes listo el KIMONO de JUDO
