This alpine stitch crochet bow started as a simple test… or better said, as many small experiments that slowly began to tell a story.
What began as a small project to explore texture and relief gradually turned into a creative space where I could test different yarns, sizes, and combinations, and understand how the same stitch can completely change depending on the material and the final use.
The initial idea was simple: I wanted to create a small crochet project that would allow me to teach the alpine stitch in an easy and approachable way. Something quick to make, timeless, and flexible enough to experiment without pressure.
That’s how the idea of turning this stitch into a bow came up, and with it, the question that changed everything: how does the alpine stitch behave in small crochet pieces? I already knew this stitch for its texture and relief, but I had mostly seen it used in larger projects. Bringing it into a smaller format marked the real beginning of this experiment.
The First Bow: Exploring the Alpine Stitch
The first bow was created simply to understand the alpine stitch in crochet. For this test, I used thin embroidery thread and a 2.0 mm crochet hook, without thinking yet about accessories, combinations, or final uses.
I wanted to answer very specific questions: how many rows I could work with a yarn that comes in a small amount, how small the bow would be, and whether the stitch would stay well-defined without losing its charm. I worked 30 base stitches and 6 rows, and the result was a delicate, well-defined mini bow, perfect for a young child’s hair or as a subtle decorative detail.
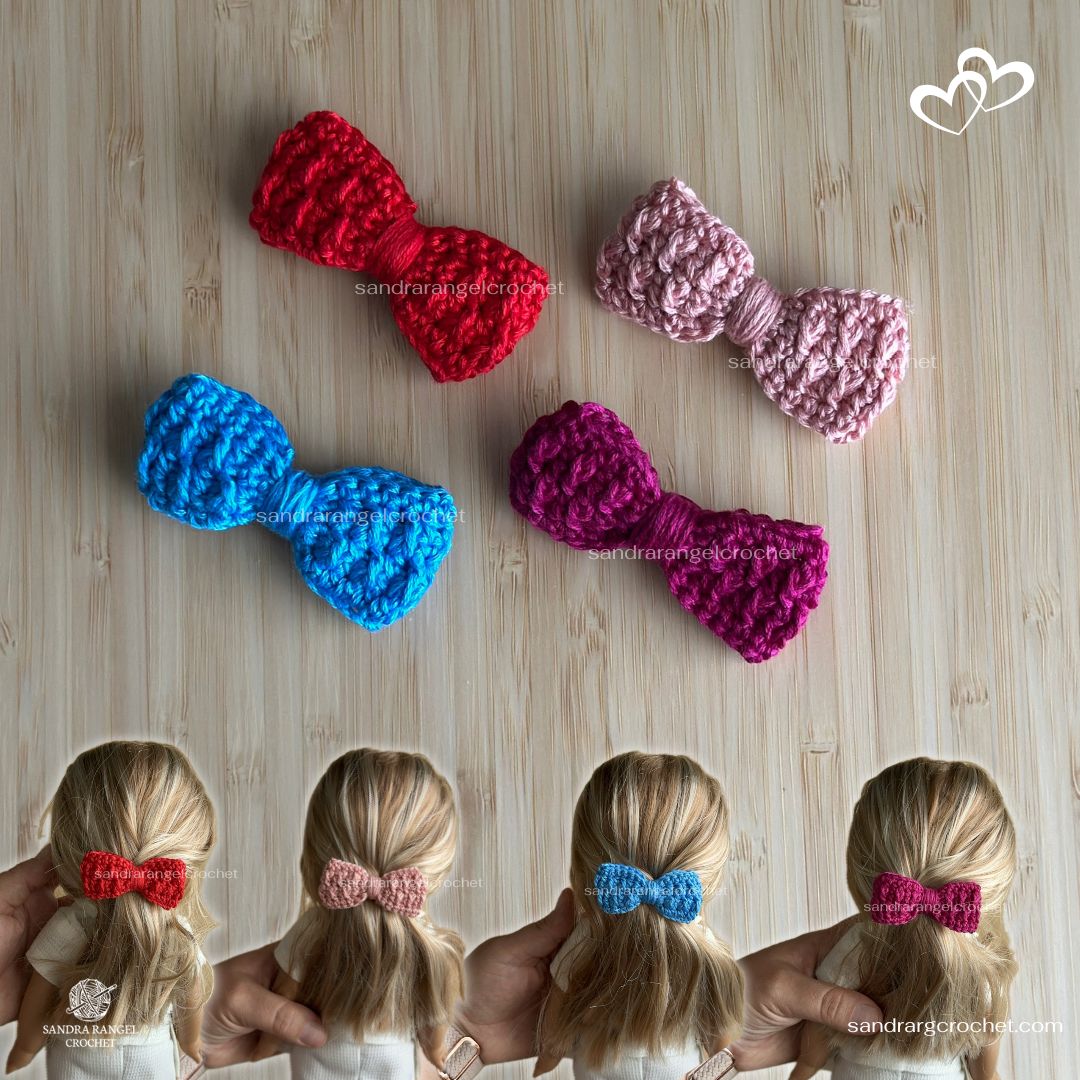
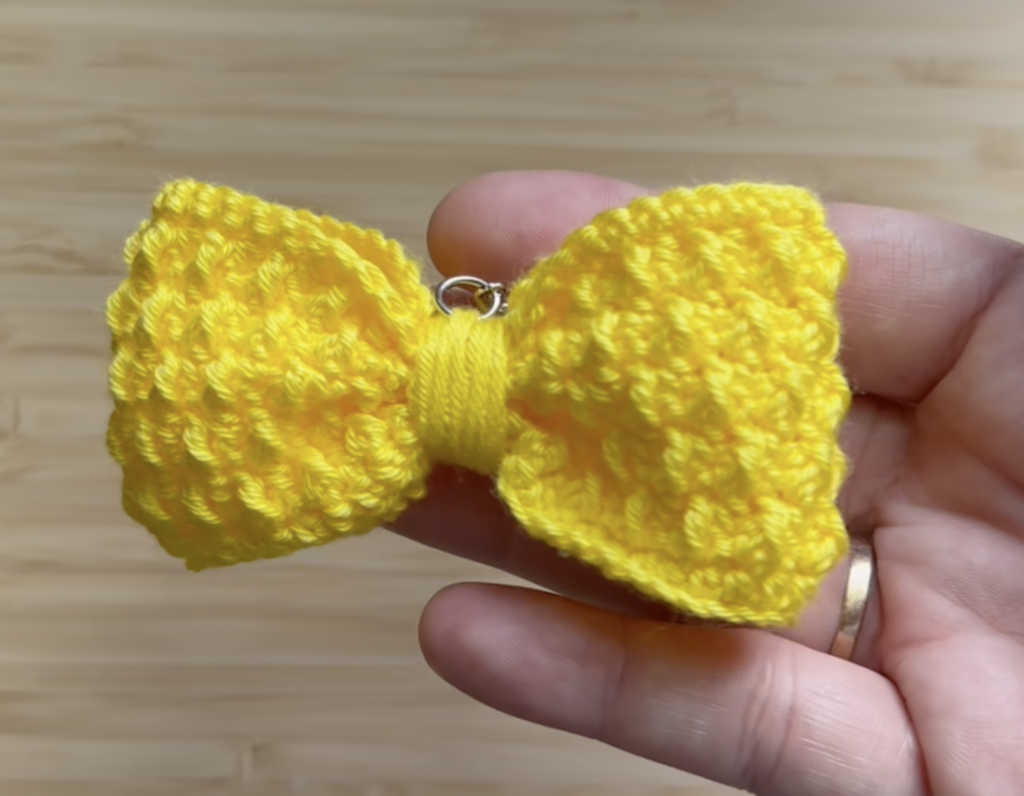
After finishing that first bow, I decided to keep testing the same design using different embroidery thread colors. I wanted to see how the alpine stitch reacted to each shade and how the relief changed visually depending on the color.
Even though the size remained small, the results varied a lot: the stitch appeared less bulky, but with very sharp definition. These tests sparked new ideas, and the bows slowly stopped being just an experiment and became potential decorative details, clips, or small handmade gift accents.
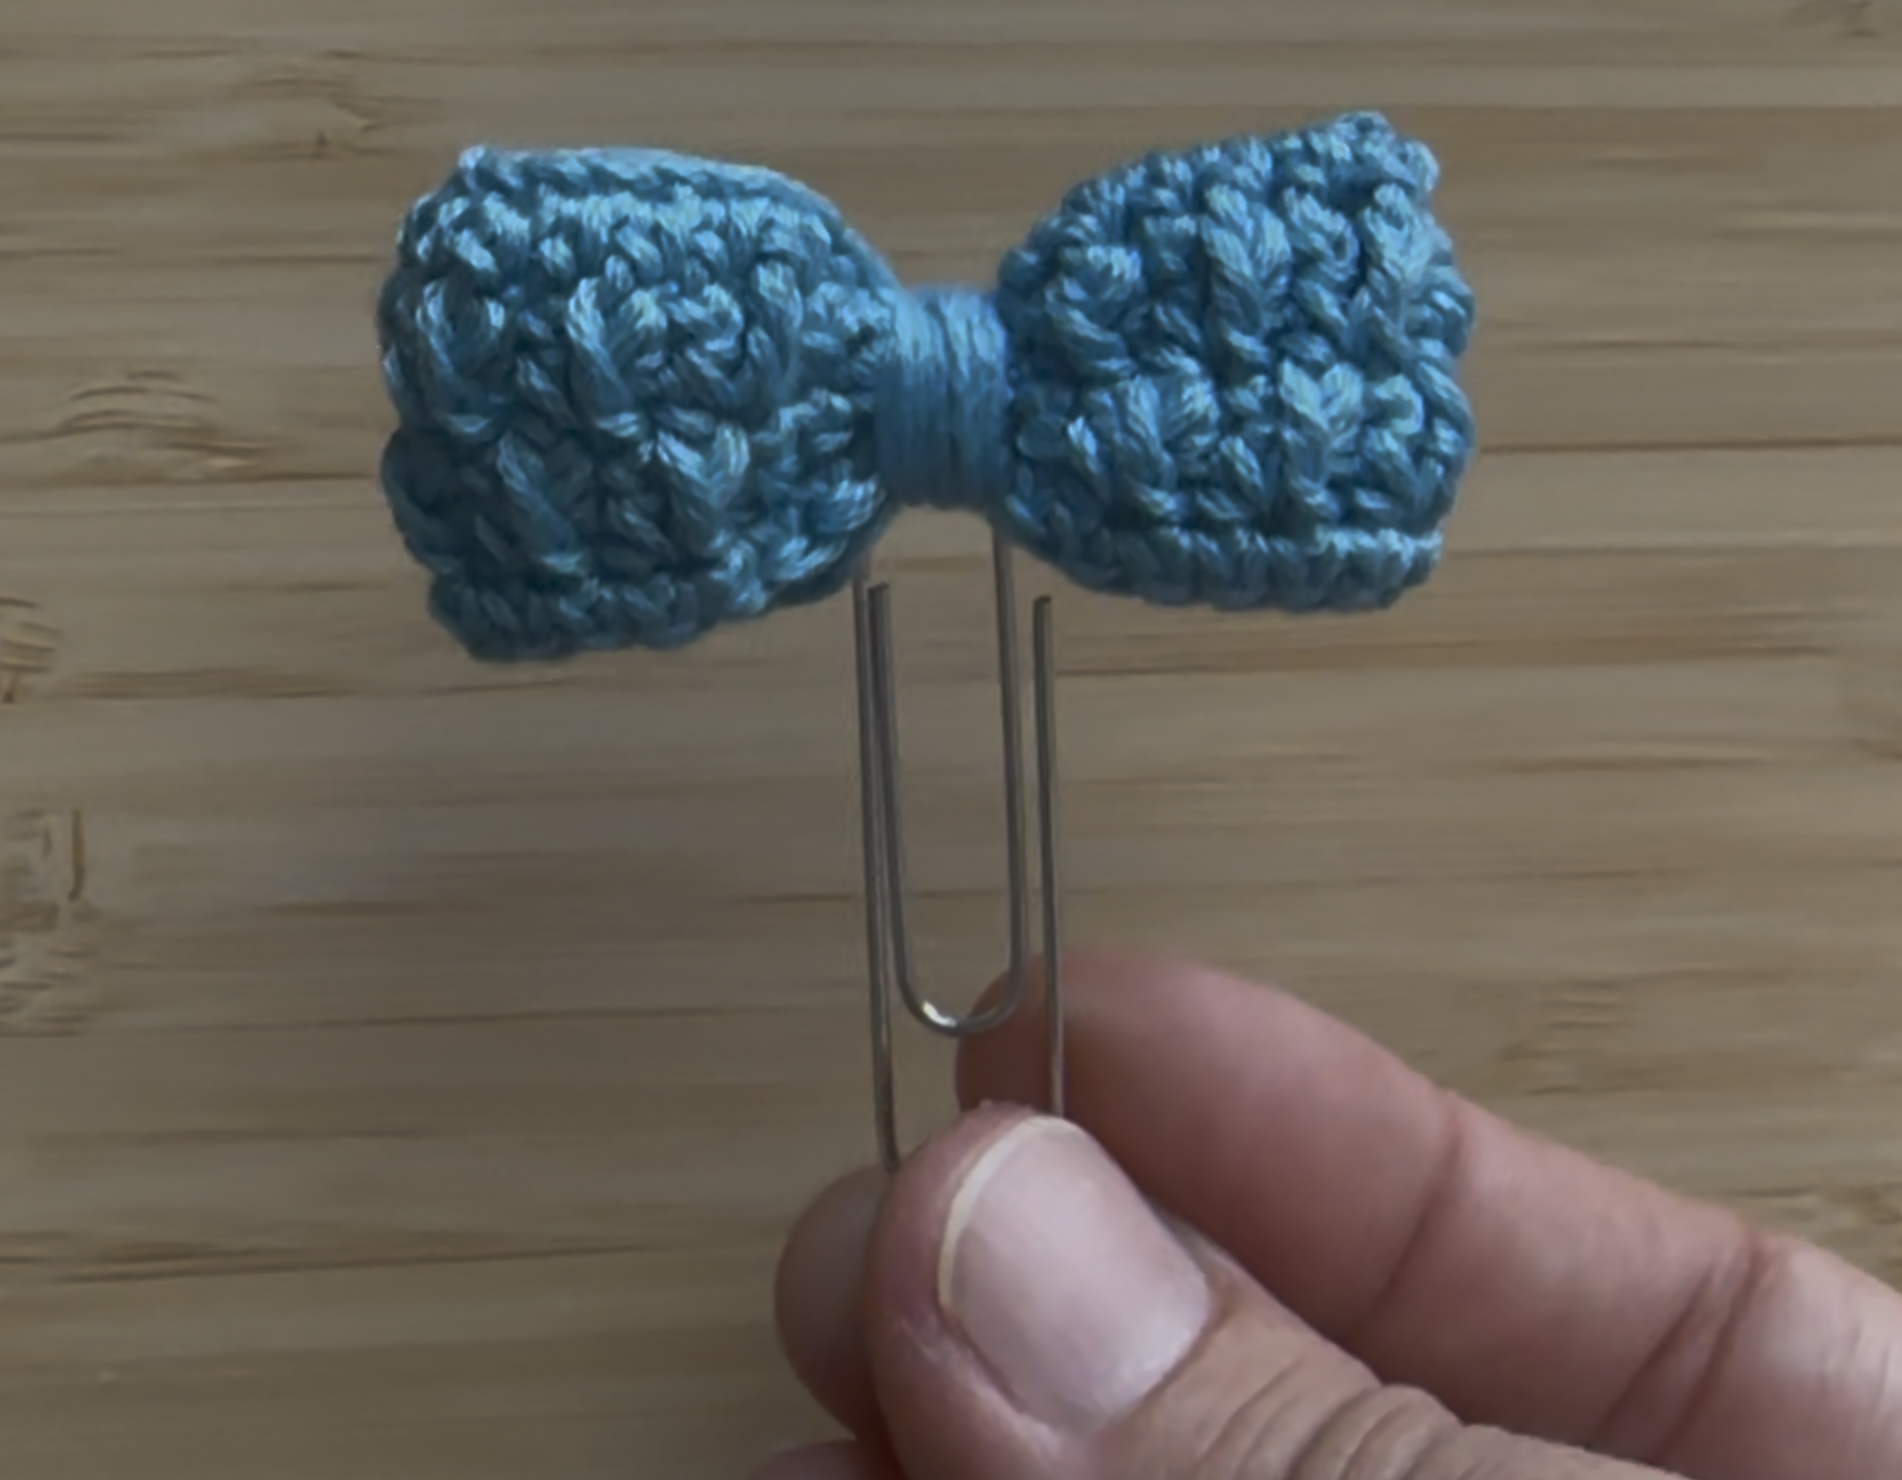
One of them even ended up attached to a paper clip, something I hadn’t planned at all, but that worked better than I expected.
If you want to learn more about the embroidery threads I used to make these bows, you can check them out here: Amazon Link. I might also create a full post about these threads, with more details, photos, and some other projects I’ve made with them.
Medium-Sized Bows: Two Colors and New Combinations
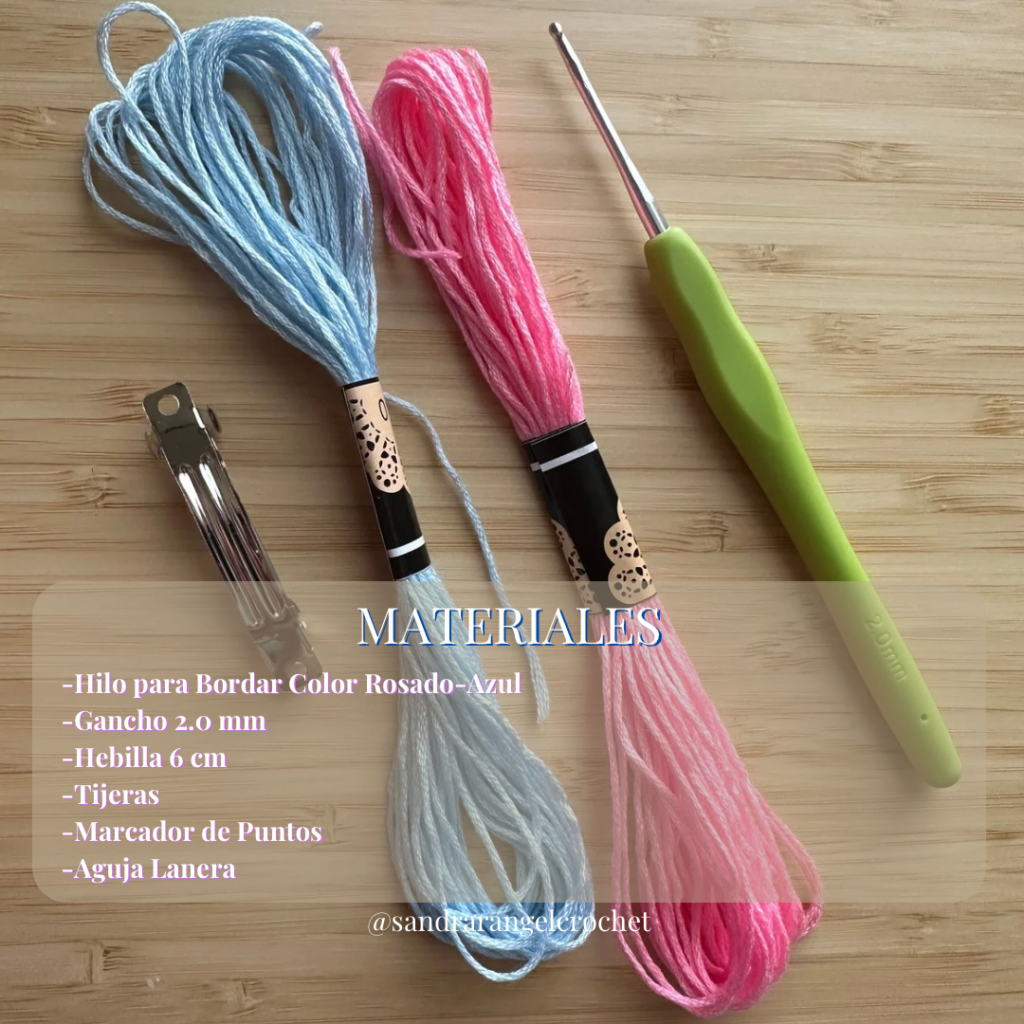
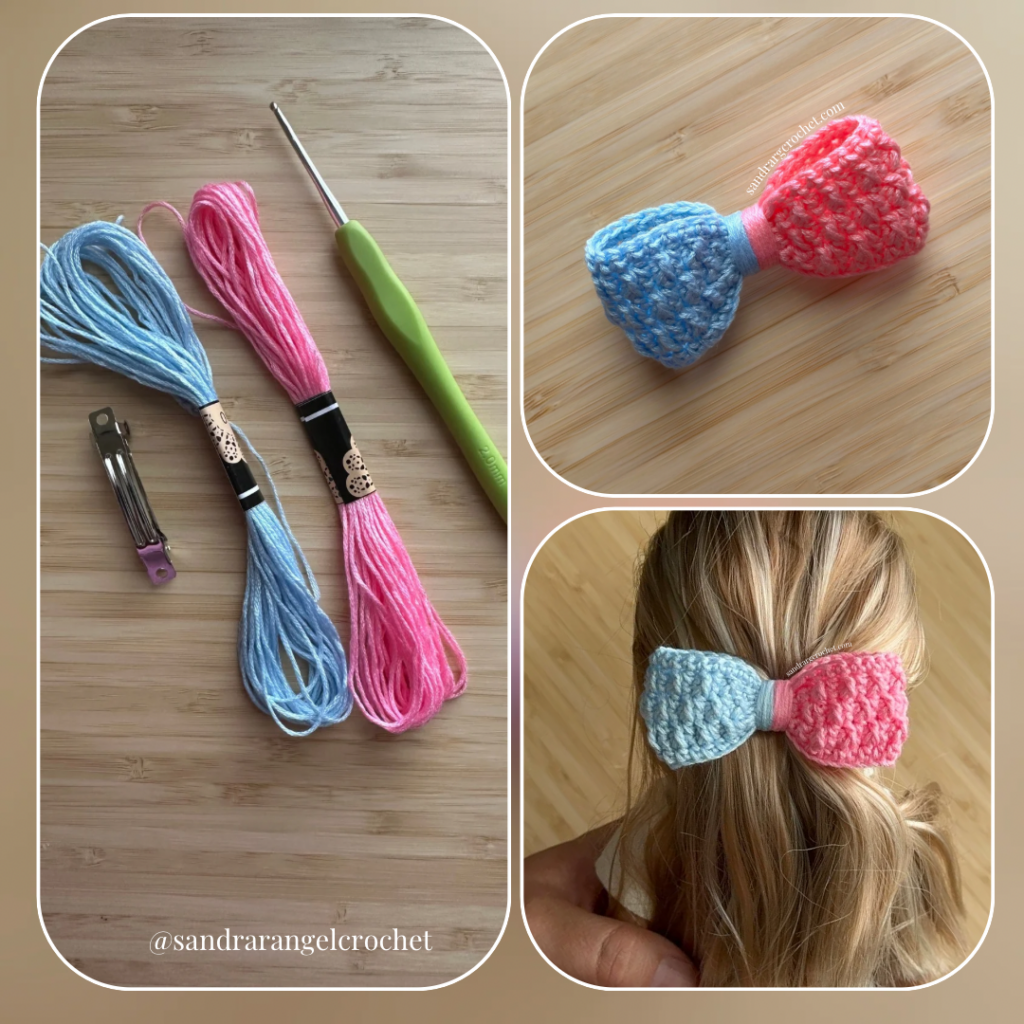
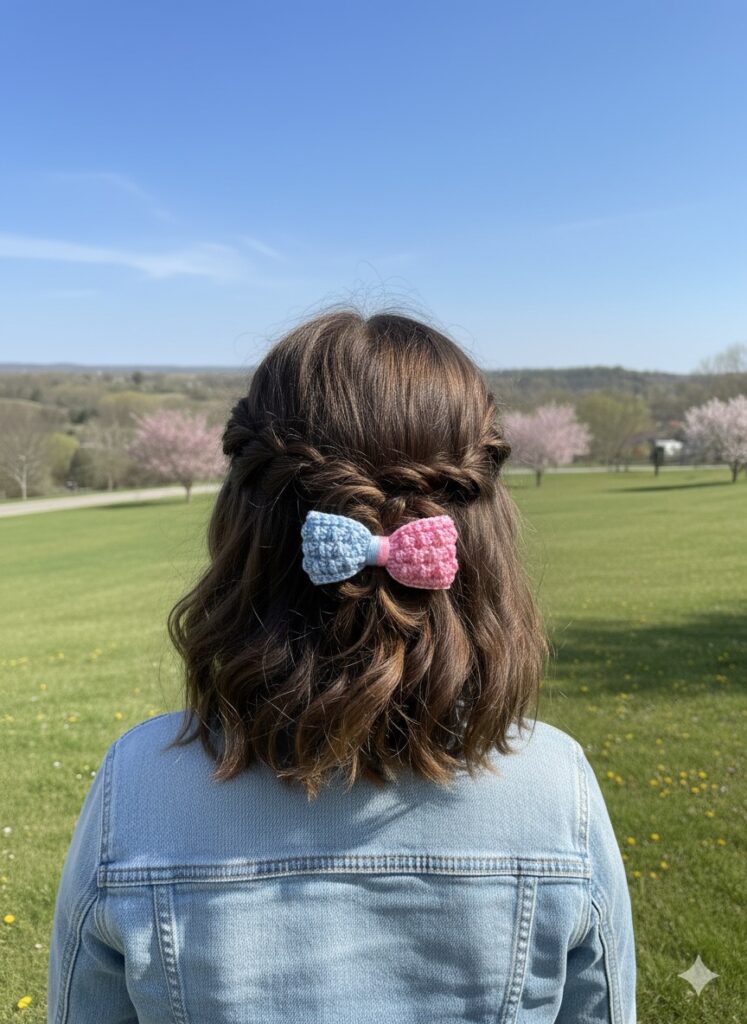
I wanted to keep working with embroidery thread, but this time my goal was to create a slightly larger bow and experiment with two colors in the same piece. I chose one skein in pink and another in blue, aiming for a soft, delicate combination that could easily work with different outfits.
For this bow, I worked 40 stitches and 8 rows, achieving a medium-sized bow that felt more noticeable while still preserving the delicacy of the alpine stitch. I liked the result so much that I decided to attach it to a hair clip, imagining it being worn comfortably by a child.
I documented this bow with step-by-step photos, and I’m considering turning them into an ebook or even a separate, more detailed blog post, which could be linked from here in the future.
Other Thin Yarns: More Stitches, More Rows, More Size
After that, I started experimenting with other thin yarns, adjusting the number of stitches and rows to create larger bows. This stage was key to understanding how the same design can transform simply by changing the material.
I explain the specific details of each test—such as stitch counts, rows, and combinations—in the YouTube video. Later on, I may also complement this post with screenshots or photos from that explanation to make the information even clearer.
Large Bows: Experimenting with Chenille Yarn
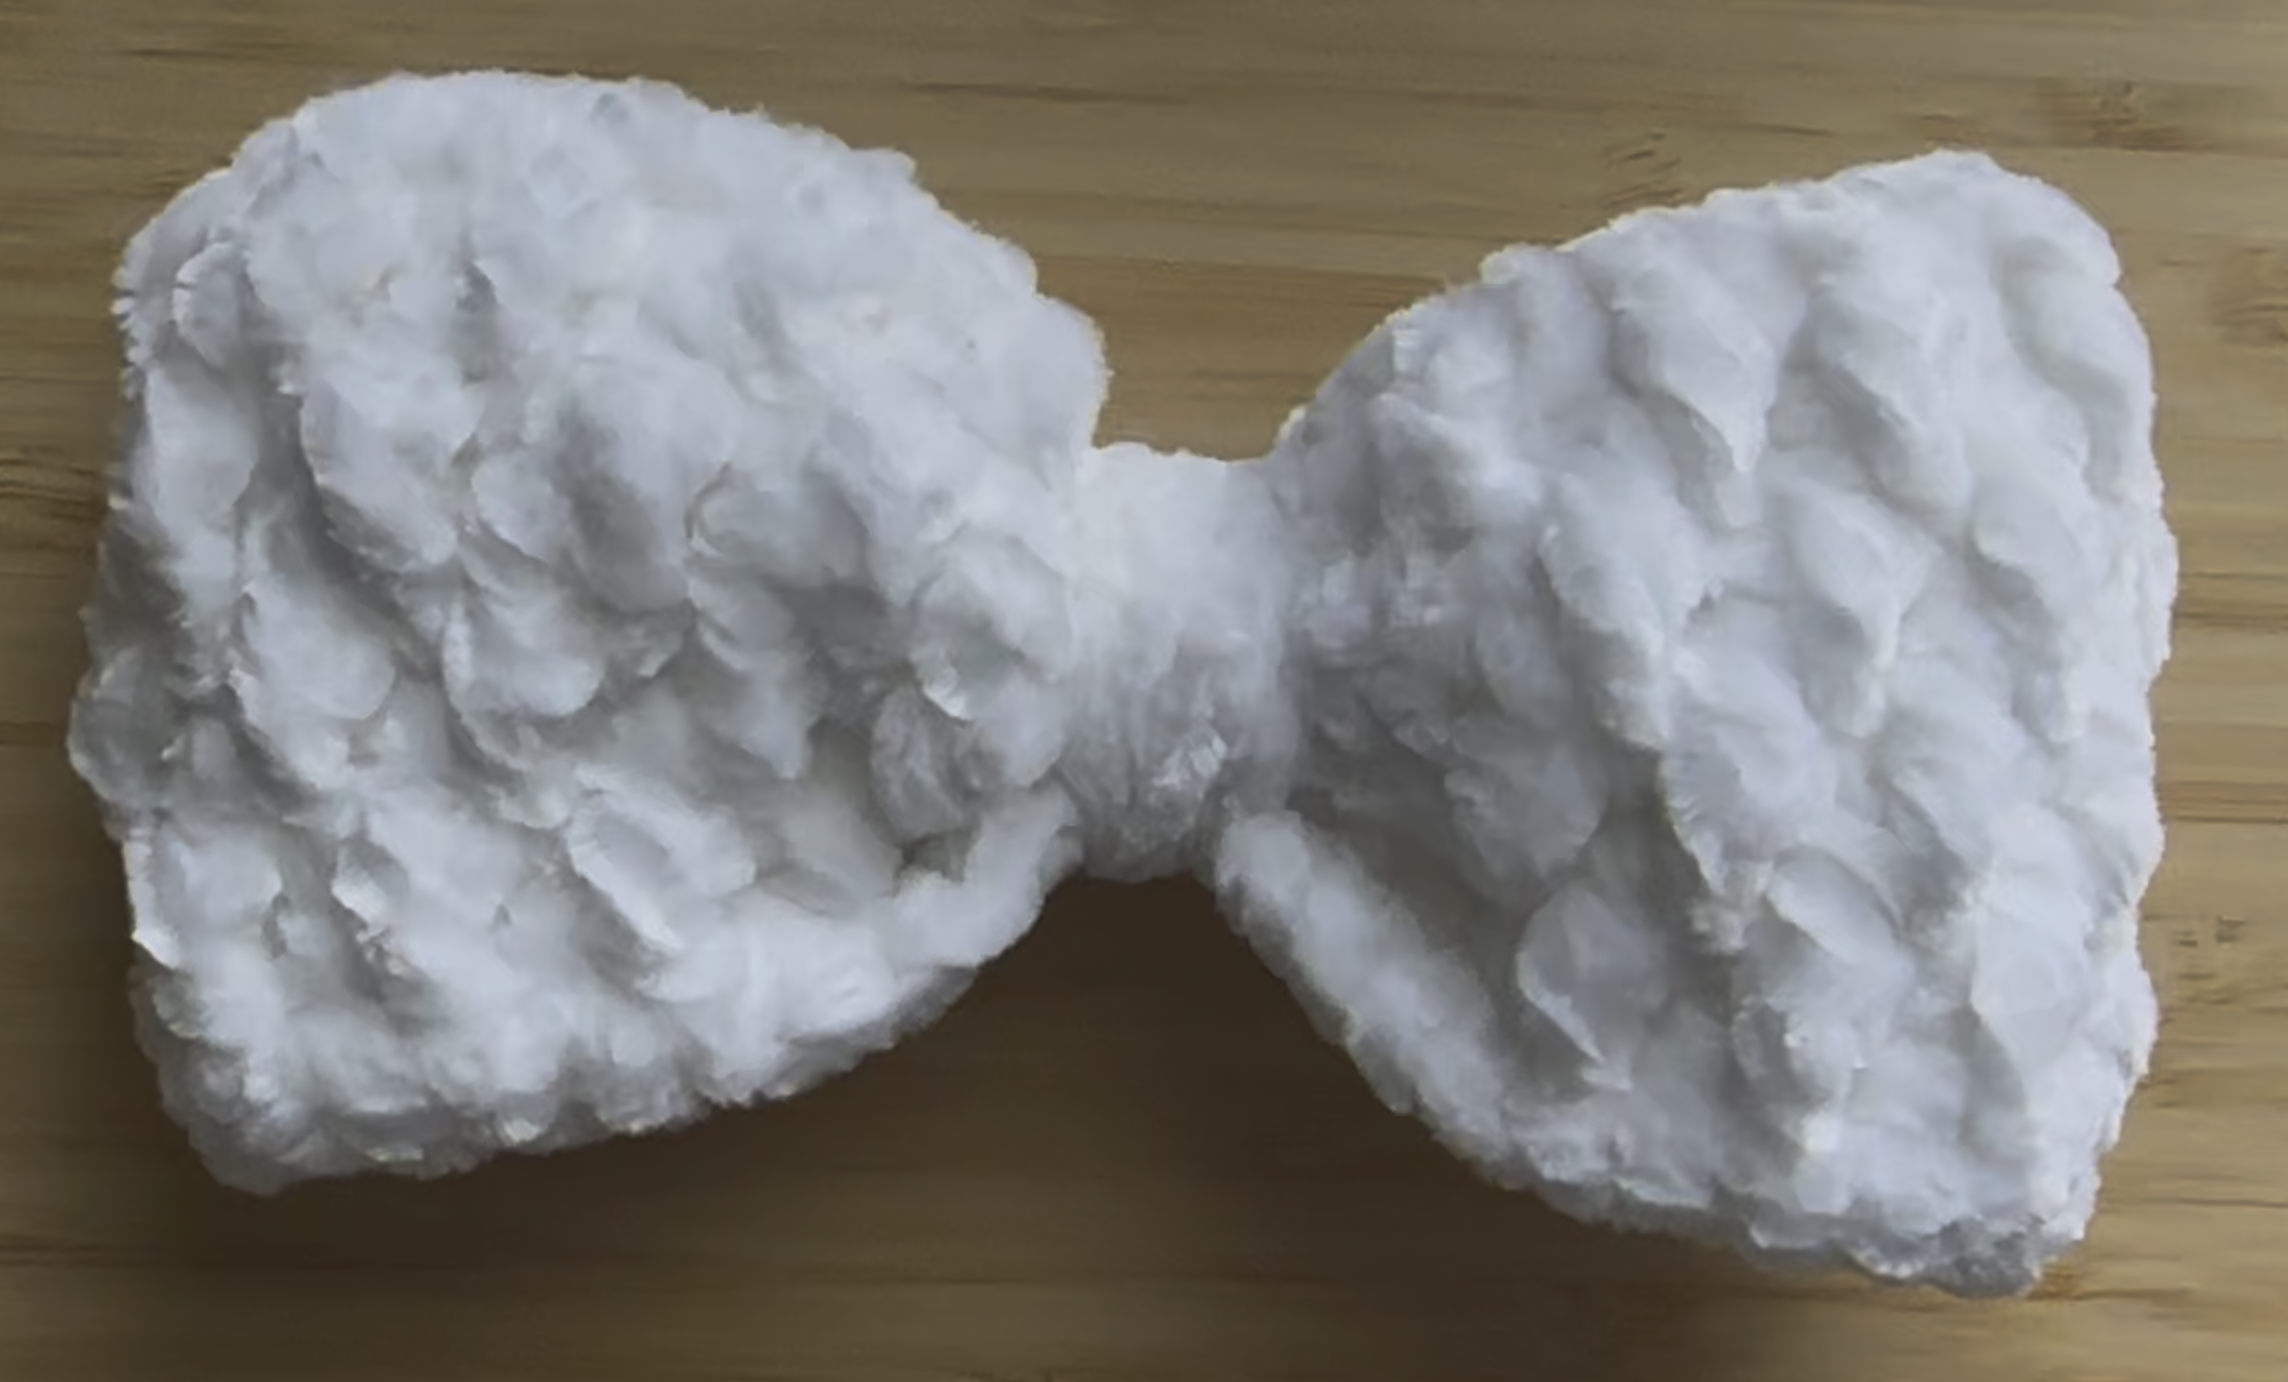
Then I decided to experiment with chenille yarn and crochet larger bows. This type of yarn is incredibly soft and pleasant to the touch, but the alpine stitch doesn’t show the same level of definition as it does with thinner materials.
Even so, the result has its own charm. Personally, I find these bows work better as keychains rather than hair accessories. They are soft pieces, perfect to carry in a bag, touch during moments of nervousness, or simply enjoy as a sensory object.
As I always say, everyone can choose how to use them, depending on their own taste and needs.
The Bow Featured in the YouTube Video
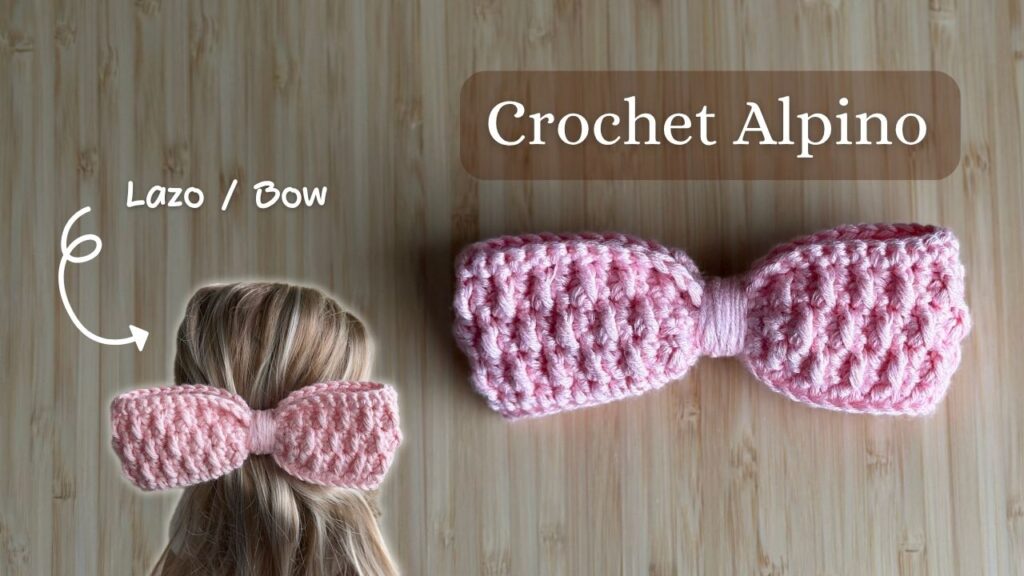
Among all these bows, there was one I decided to crochet specifically for the YouTube video. I made it in a pink shade using Truboo Yarn by Lion Brand, a bamboo yarn I love for its subtle shine, softness, and how smoothly it glides on the hook while crocheting.
In that video, I show you step by step how I made the bow, and I also share all the other bows I created throughout this experimental process with the alpine stitch and different materials.
If you want to see the alpine stitch chart, it’s available in my YouTube shorts, along with other quick explanations that complement this project.
This post was a little creative lab where I explored different sizes, colors, materials, and uses for crochet bows. Each test taught me something new, and that’s exactly what I love most about crochet: discovering while creating.
Leave me a comment letting me know which other projects or techniques you’d like me to share in future posts—I’d love to hear from you! 🧶
Amazon Affiliate
Si quieres conocer los materiales que utilizo en mis proyectos y como creadora de contenido, los encuentras en mi perfil de Amazon.
We use cookies to ensure that we give you the best experience on our website. If you continue to use this site we will assume that you are happy with it.